Workflows in Data Pipeline Studio
In the age of data privacy regulations and internal data standards, an organization must ensure that data is consistent across different systems within the organization and data complies with external regulations. Inconsistent data can create data integrity issues and adversely affect the accuracy of business intelligence generated from the data. Approval workflows establish responsibility and accountability for various activities and decisions related to data.
How do I use workflows in Data Pipeline Studio?
Using Workflows in Data Pipeline Studio is a two-step process that involves the following:
To create a Workflow template
-
Click Configuration in the left navigation pane of the Calibo Accelerate platform.
-
On the Standards tile, click Configure.
-
Click the Workflow Templates tab and then click + New Workflow Template.
-
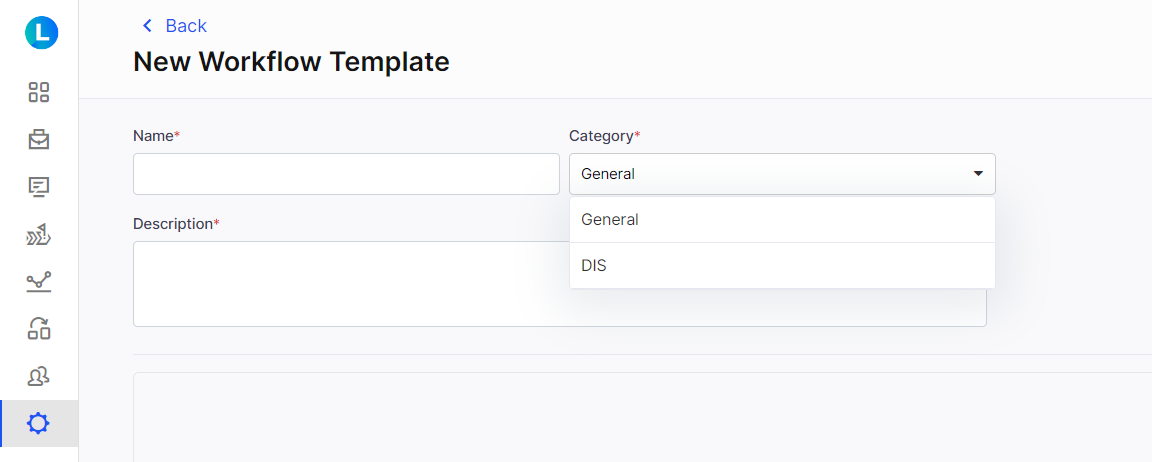
On the New Workflow Template screen, do the following:
-
Provide a name and description for the template.
-
Select the Category as DIS.
-
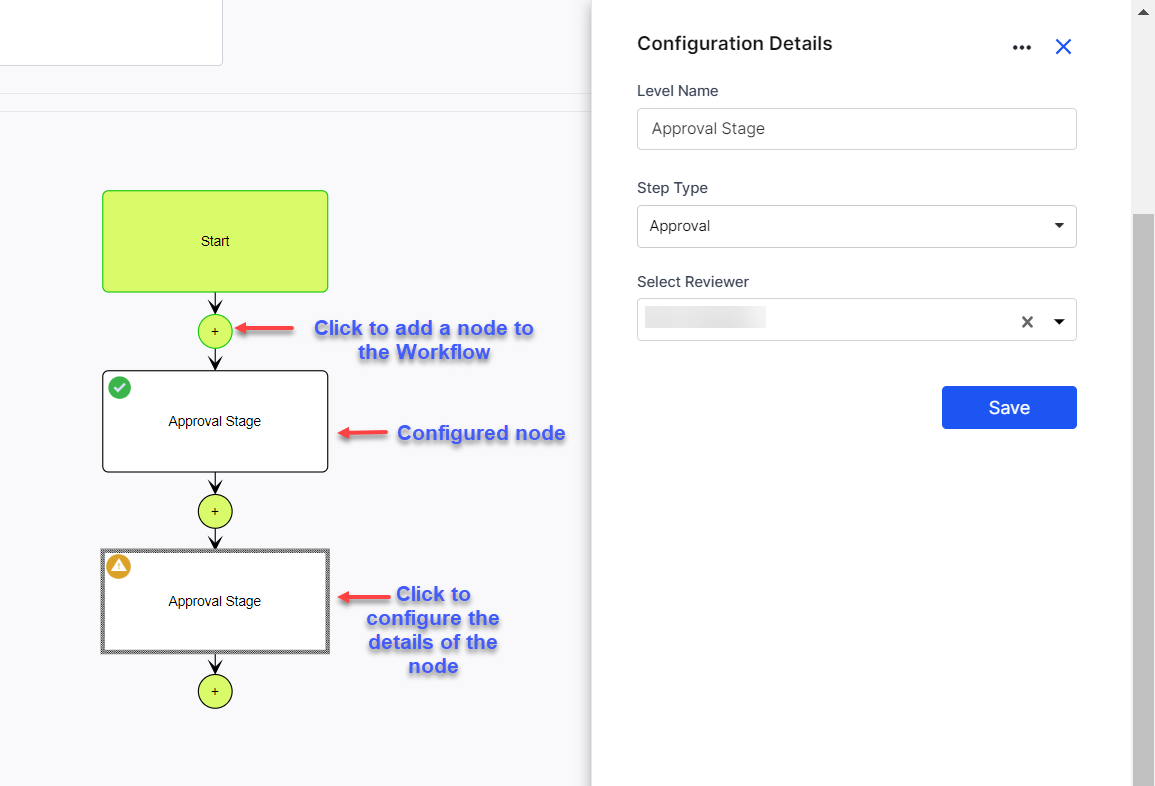
Click + to add a node to the Workflow.
-
Click an added node to configure it. Provide the following details:
-
Provide the Level Name. By default it is Approval Stage.
-
Select the Step Type as Approval.
-
Select a reviewer from the dropdown list.
-
Click Save. The node is now configured.
-
-
After adding the required nodes and approvers, click Create. Your Workflow template is now ready to be used in a pipeline.
To add a Workflow stage and node in DPS
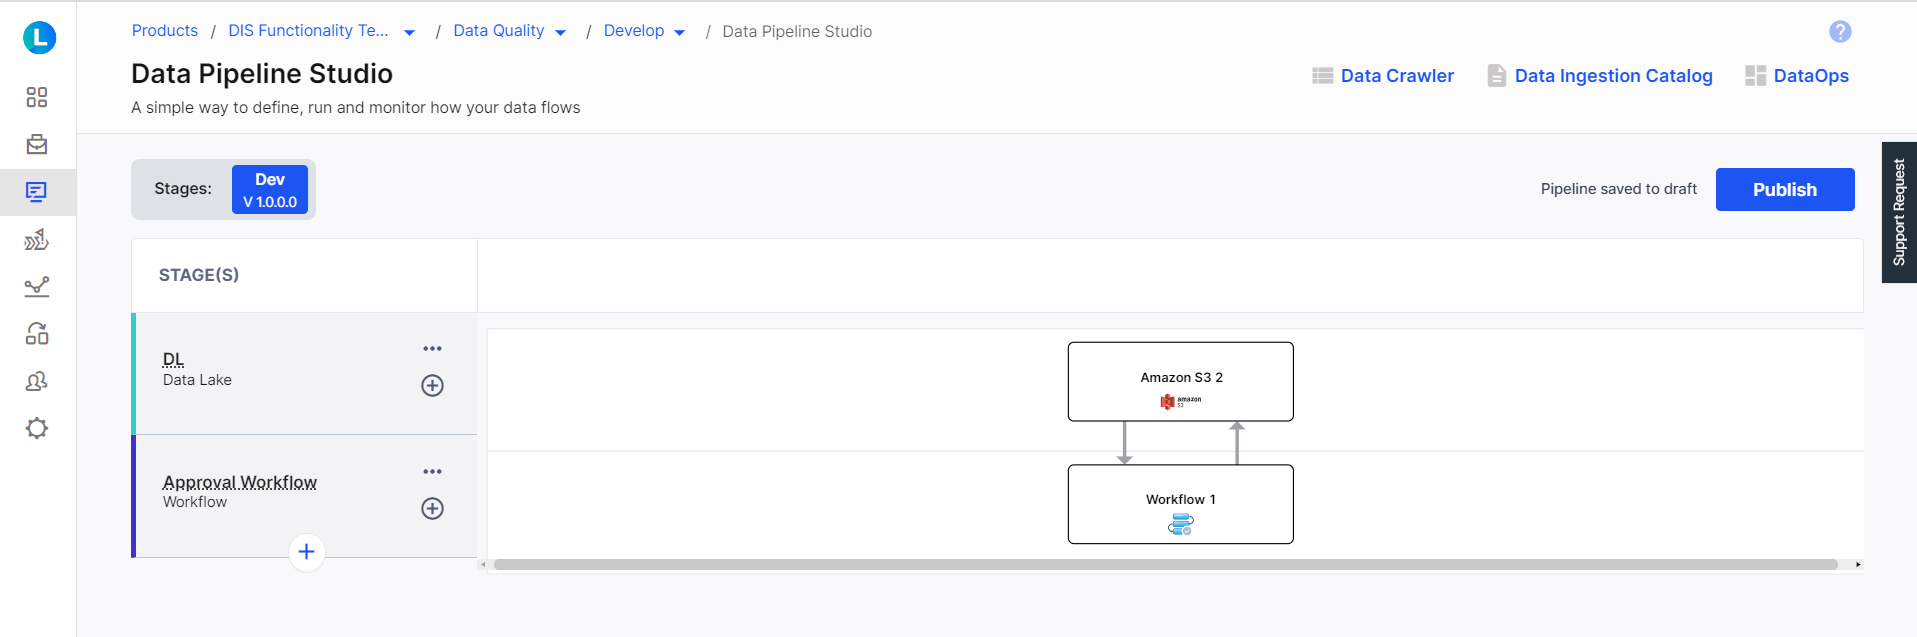
Data Pipeline Studio provides Workflows as a separate stage in a data pipeline, that you can add and connect to the Data Lake stage. The Workflow node is connected to and from a Data Lake.
-
In an existing pipeline, add a Workflow stage below a Data Lake stage and provide a name to it.
-
Add a Workflow node to the stage.
-
Click the Workflow node to configure it.
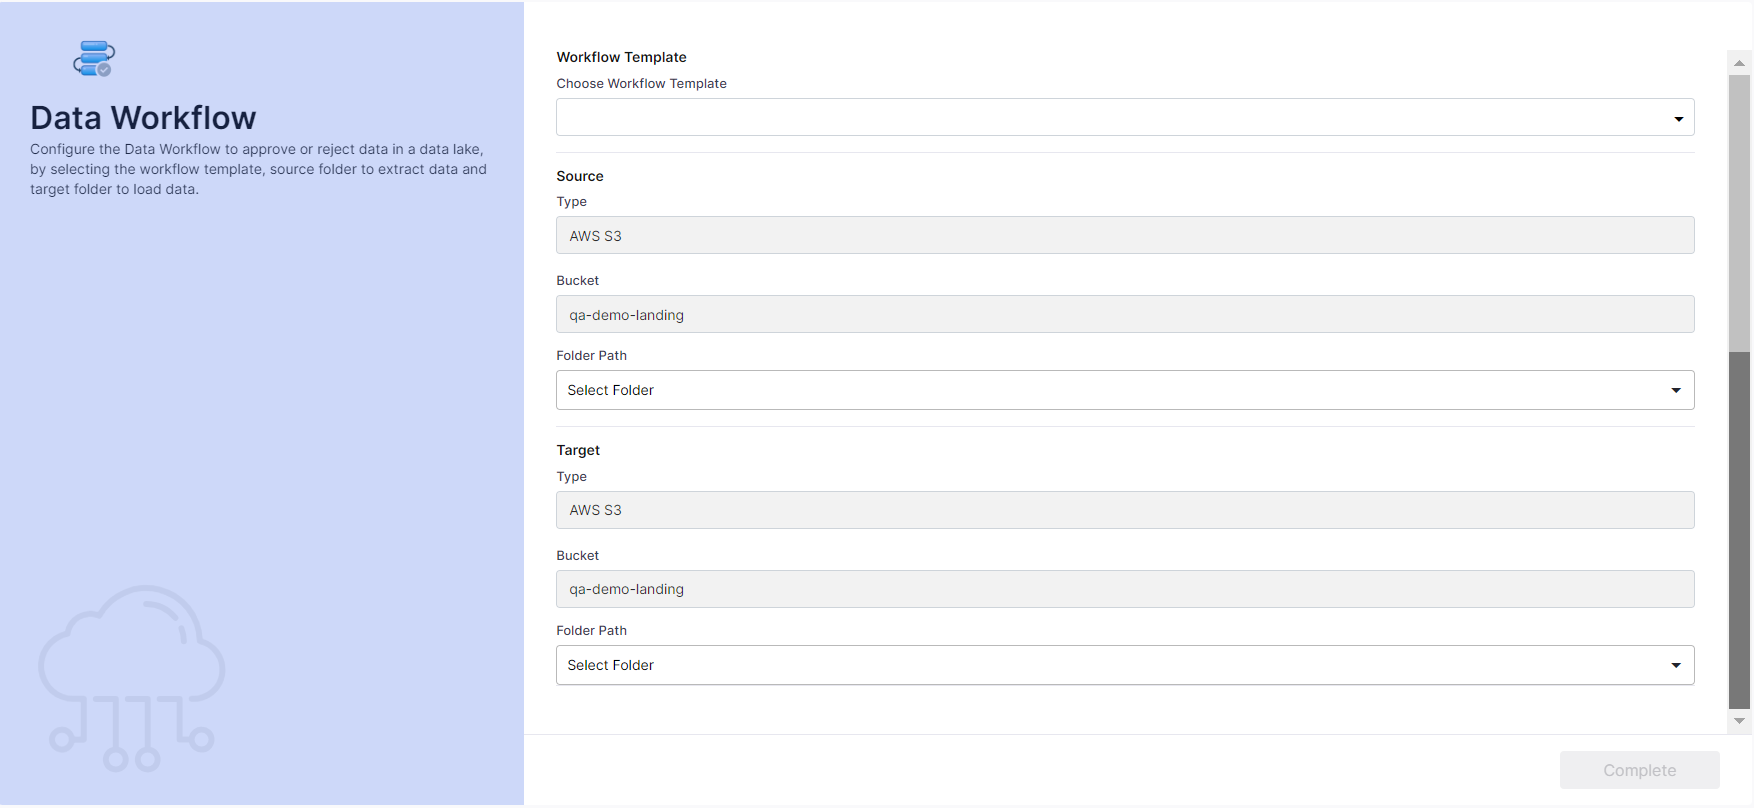
Provide the following information:
-
Choose Workflow Template - select the required workflow template from the options in the dropdown list.
-
Folder Path (Source) - select a folder path for the source.
-
Folder Path (Target) - select a folder path for the target.
-
-
Click Complete. The Workflow node is now configured and you are ready to run the pipeline.
To initiate the Workflow
-
Publish the pipeline after you complete the configuration of the Workflow node.
-
Click Run Pipeline.
| What's next?Audit Logs in Data Pipeline Studio |